The full picture
The Option 1 method is relatively straightforward. You have a webpage containing the image on your website with an HTML tag something like:<IMG SRC="images/webcam.jpg">On your Home PC, your video capture software is configured to capture a new image at an interval decided by yourself (usually somewhere between 30 seconds and 60 seconds seems most common). The FTP software is configured to upload the image to your website at a similar interval and that's it.
Although the image won't update automatically while a visitor is viewing the page, the 'FTP method' isn't really suitable for a more "real time" type of update. If a visitor wants to view the page for any length of time, they can simply hit the browser's Refresh button to update the image. For a more dynamic virtual real-time update, option 2 comes into its own!
Running a webserver
|
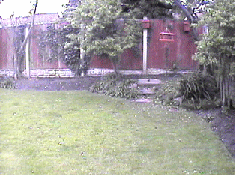
Well, ok, I'm cheating with the picture on the left but that is the sort of 'update speed' that is reasonable
with a broadband connection - but don't forget that a lot of your visitors will be on dial-up so, if you want to
update often, keep the images small. Most capture software saves the images in JPG format which allows the amount of compression to be adjusted. As with all images you use on your website, it's a compromise between quality and speed of download. |
The instructions for the webserver you choose will explain all you need but the most important thing is to set it's Root folder. It is in this folder that the video capture software must save the image.
The webserver will also ask you to select a 'Port'. This is an "extension" to your IP address and can be any value between 0 and 65,535. Some port numbers (called Well Known Ports) are reserved for specific purposes but your server software should give you guidance. If in doubt, use port number 80 or 8080 - the standard ports for HTTP used for webpages.
The webpage code
In order to write the necessary 'code' on the webpage, you now need to be armed with the following information:- Your IP address which connects your home PC to the internet. If you're using a single PC and modem, this address should be shown somewhere in the server. If you're connecting to the internet using an external router, the address will be available in the router.
- The Port Number you've set for the server.
- The name of the captured image - which, in this example, must be saved in the server's Root folder.
Let's assume the IP address is 123.456.789.123, the Port number is 80 and the image is saved as webcam.jpg
First of all, look at the actual tag for the image. It's very similar to the one we used for the FTP method except for the addition of NAME="pic" and the SouRCe for the image is now our (assumed) IP address and Port number:
<IMG SRC="http://123.456.789.123:80/webcam.jpg" NAME="pic">In order for the image to update automatically we need to add some simple code. Somewhere near the top of the webpage, between the <HEAD> and </HEAD> tags, add the following code:
<SCRIPT TYPE="text/javascript">
  var pict = new Array(1);
  pict[0] = new Image();
  preload();

  function preload() {
    var now = new Date();
    pict[0].src = "http://123.456.789.123:80/webcam.jpg?" + now.getTime();
  }

  function update () {
    preload();
    document.images["pic"].src = pict[0].src;
  }
</SCRIPT>
Note the code I've shown in bold. That is the URL to our assumed IP address, the port we assumed on the webserver
and the name of the captured image. Don't worry about the ?" + now.getTime(); - that's just a
javascript 'trick' to make sure the visitor's browser updates the image properly.Finally, to set that code into motion, add the following to the webpage's BODY tag:
<BODY OnLoad="setInterval('update()', 10000)">
Be careful not to confuse the " and the ' in the code above. And there you have it! Although it might seem a lot of work compared with the simpler FTP method, it can be worth it. For example, it doesn't have to be webcam images, it can be any images that you want to change on a regular basis except now you don't need to FTP them to your website - visitors come to your home for them!
© Copyright