Collecting the components
There was a time when there was an electronic component supplier in nearly every town. Sadly they've all but disappeared over the years and we're left with a few stalwart suppliers only available to most of us by mail order and the internet.I was able to build this project from components in my "Spares Box" - spare components that I've collected or salvaged from discarded projects over the years. As you probably don't have a spares box, for now, there's no alternative but to order the parts from one of the suppliers.
|
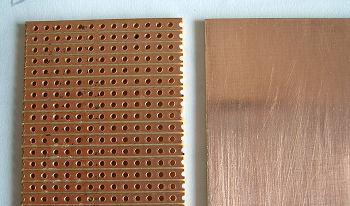
Although this 'component' (shown left) isn't shown in either the circuit diagram or the parts list, it is the
foundation for the whole project - literally. Tutorials sometimes show projects built on 'breadboard' or 'prototyping board' - special boards with a matrix of tiny inter-connected sockets into which components can be plugged so building a project without any soldering. Although these are fine for their limited purpose, we want to finish up with a project we can use and keep. |
As shown on the right, in the photograph above, it begins life as a complete sheet of thin copper bonded onto a sheet of fibreglass board about 1mm thick. Our mission is to etch away areas of the copper in order to leave a facsimilie - or, more correctly, a representation - of the inter-connecting wires shown in the circuit diagram on the previous page. Before we can begin laying out the components on the board, we need the components so now's the time to make the list and order them. Here's a few website addresses worth checking out:
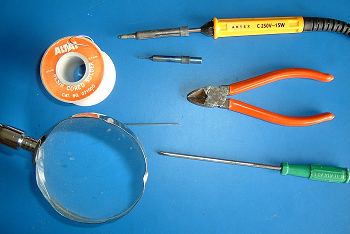
While you're ordering the components, you'll also need some etch-resist transfers and some etching solution. You may also need some "tools of the trade." The photograph shows some of the tools you'll need for electronics projects.
|
I use a 15 watt soldering iron with an inter-changeable tip. The 3mm tip suits virtually all soldering but
I have a 1mm tip for the really small jobs - hence the inclusion of a magnifying glass in my toolkit! I use
one that's on a flexible stalk and a heavy base so as to keep both hands free. Also shown is a reel of resin-cored solder. Best suited for electronics work, it is a 60/40 tin/lead alloy with an overall diameter of 0.7mm. A reel will last for years. This project will use less than 10cm. Also shown are a pair of small side-cutters for nipping off the excess wire from components after soldering and a small electrical screwdriver with a 6 inch blade. |